

There are couple of things more delightful than a properly-prepared roasted turkey. Turkey is welcome in my kitchen, and my table at any time of the year. Crispy-browned skin, succulent wet meat, and an amazing fragrance are the hallmarks of a well-prepared turkey. To this end, numerous techniques for cooking are tried, such as smoking (my favorite), frying (aaauuugh!!!! The ruination of a worthy bird …), rotisserie (tough, but rewarding if you have the devices), and many frequently, roasting.
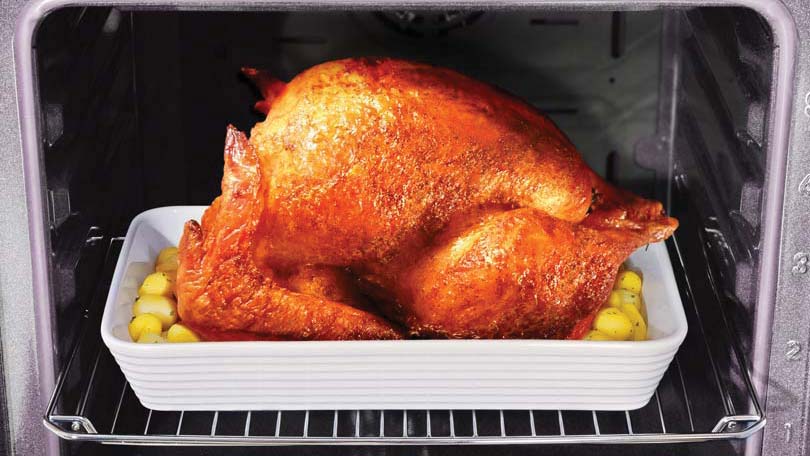
Roasting is the very best method for most people to get consistency, but a lot of ovens have cold and hot spots in them that can effect the cooking procedure. Some parts of the bird may get more done than others, specifically parts like the wings and sides of the legs, that are often better to the heat source than the breast. To minimize this result, makers have actually marketed the stove.
To start with, all cooking is done by ‘convection’. Without getting too technical, convection is the natural propensity for locations of high energy, such as heat, to transfer energy to areas of lower energy, such as cold. Hot air will move its energy to cold food to make it hot. Stove simply make the procedure more effective by flowing air uniformly around the food, triggering a more even transfer of energy. A convection oven need to really be called a forced-convection oven. Lots of foods gain from being prepared in convection ovens, however there are some that do not fair too. Breads, cookies and stuffing rapidly dry out in the moving air, and are best prepared conventionally, however meats prepare quicker and more equally by convection.’
As a guideline, cooking times will be from 15% -30% less than in a conventional oven, depending on your oven. Also, it is a good concept to decrease the cooking temperature levels by 10% or more. Here are a few ideas for preparing a turkey in a convection oven:
It is very crucial to salt water a turkey beforehand to avoid it drying throughout cooking in a stove. Regular basting, or a mix of both can likewise be utilized. It is likewise a great idea to have a pan of water in the bottom of the oven while cooking.
Packing need to truly be cooked independently, and put in the turkey at the end of the cooking process.
A trussed turkey will keep more wetness than a splayed out one. The best way to truss a turkey is to make a slip knot in the end of the string, loop the string in the ‘elbow’ of both wings, draw it tight, then run the string over the back to the legs.
An excellent guideline for cooking times is around 10-12 minutes a pound for an unstuffed turkey, but do not count on cooking times alone. Use a thermometer. The turkey is done when the juices run clear, and the thigh temperature level is 180º F, and the breast is 170′ ºF. The stuffing ought to be 160′ ºF.
To have a moist, succulent turkey, cook it breast-side down. You can turn it over for the last 45 minutes of cooking for appearances if you desire. Cooking it breast-up will dry the breast out. You can likewise cover the breast with foil, however it is better just to cook the turkey breast-down. This also makes it a lot easier to remove the trussing string, due to the fact that it will be on top.
Brining a turkey overnight prior to cooking makes a huge difference in the ended up bird. An excellent rule-of-thumb is to salt water the turkey one hour for every pound. You will require more than 1 gallon to cover the turkey, but this is the standard proportions.
Make sure the bird is defrosted out.
Clean off the bottom rack in your fridge, so that you can fit either a brining container, or roasting pan on it.
If you have a food-grade plastic pail with a lid that will both hold the turkey, and fit in your fridge, then you’re great to go. Location the turkey in the pail, cover it totally with brine, put the cover on, ad location it on the rack in the refrigerator.
If you do not have access to a bucket, get a clean garbage bag that is without holes, and does not leak water, and put the turkey in it with the opening directly on top. Place the turkey and bag in the roasting pan. Now, fill the bag with salt water to cover the turkey. If you can not completely cover the bird with brine, you may require to add a couple of hours to the brining time, and possibly rotate the turkey in the bag about half-way through the process. When you are ready to cook the turkey, remove the pan from the fridge, remove the turkey from the bag, dispose of the bag and salt water, wash the roasting pan well, wash the turkey well and pat dry, then place in the roasting pan and cook as desired. Do not recycle the salt water for anything.
It is extremely crucial to let the turkey ‘rest’ for 15 minutes or two prior to carving and serving. When the turkey is done, get rid of the trussing string, and put it breast-side up on your sculpting surface. Let the bird rest for 15-20 minutes prior to carving, to allow the juices to re-circulate through the bird. All that’s left is to delight in an ideal bird.


